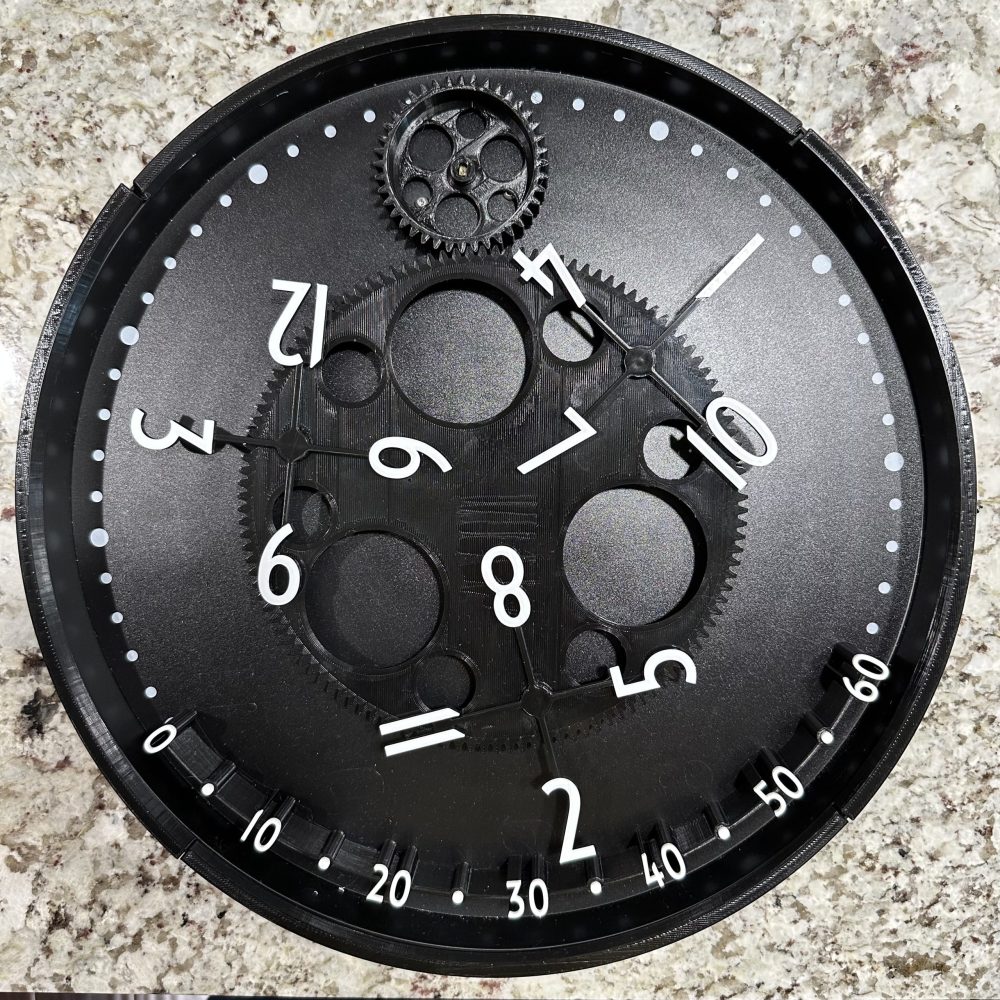
If you’re a DIY enthusiast like me, you probably love building and tinkering with things. One of my recent projects was building a 3D-printed wandering hour clock, which is a clock that tells time using a series of rotating dials instead of traditional clock hands. However, I encountered some issues when trying to get the dials to turn using a high-torque clock movement as suggested in the original instructions. After some research, I found a remix of the clock that used a stepper motor instead. In this post, I’ll share my experience with using an Arduino sketch to program the stepper motor for the clock and the improvements I made to the original version.
The Original Clock Design
- The journey began with the original instructions for the 3D-printed wandering hour clock.
- Despite successfully collecting and 3D printing the required parts, I encountered challenges while trying to get the dials to turn smoothly using a high-torque clock movement.
- I fine-tuned my 3d printer based on the instruction from Teaching Tech and printed some of the parts multiple times, but it still did not work and stalled randomly.
Upgrading to a Stepper Motor
- In my quest for a solution, I stumbled upon a remix of the clock design that incorporated a stepper motor.
- Since using a stepper motor provides much higher torque, better precision, and control, this alternative mechanism looked much more promising. So I decided to replace the original clock movement with the stepper motor to achieve the desired functionality.
- Transitioning to the stepper motor mechanism presented new challenges, particularly with the Arduino code provided in the remix. Through trial and error, I identified and resolved several bugs to ensure the proper operation of the stepper motor.
- Additionally, I identified an inconvenience with the original push button interface when the clock was mounted on the wall, motivating me to explore alternative approaches.
Introducing New Features and Enhancements
- To address the limitations of the push button interface, I revamped the clock’s functionality by incorporating new features.
- First, I implemented time synchronization with an NTP server via Wi-Fi, ensuring accurate timekeeping.
- Additionally, I developed a web server interface to manage and troubleshoot the clock remotely, eliminating the need for physical push buttons. These enhancements significantly improved the overall user experience.
Links
For those interested in recreating this modified wandering hour clock, I have provided detailed instructions and the Arduino sketch on my GitHub repository at the Link below. The instructions will guide you through the assembly process, wiring connections, and steps for programming the Arduino with the revised sketch.
Showcase


What began as a challenging project with the original wandering hour clock design evolved into an exciting journey of discovery and innovation. By leveraging the power of Arduino and the versatility of a stepper motor mechanism, I successfully transformed the clock into a modern timekeeping masterpiece. Through the utilization of an NTP server for time synchronization and a web server for clock management, I created a user-friendly and convenient solution for both timekeeping and troubleshooting. I hope this project inspires fellow DIY enthusiasts to embark on their own creative endeavors, pushing the boundaries of what’s possible with Arduino and 3D printing. Remember, the possibilities are endless when it comes to DIY! Check out my other posts on DIY if you are looking for ideas.