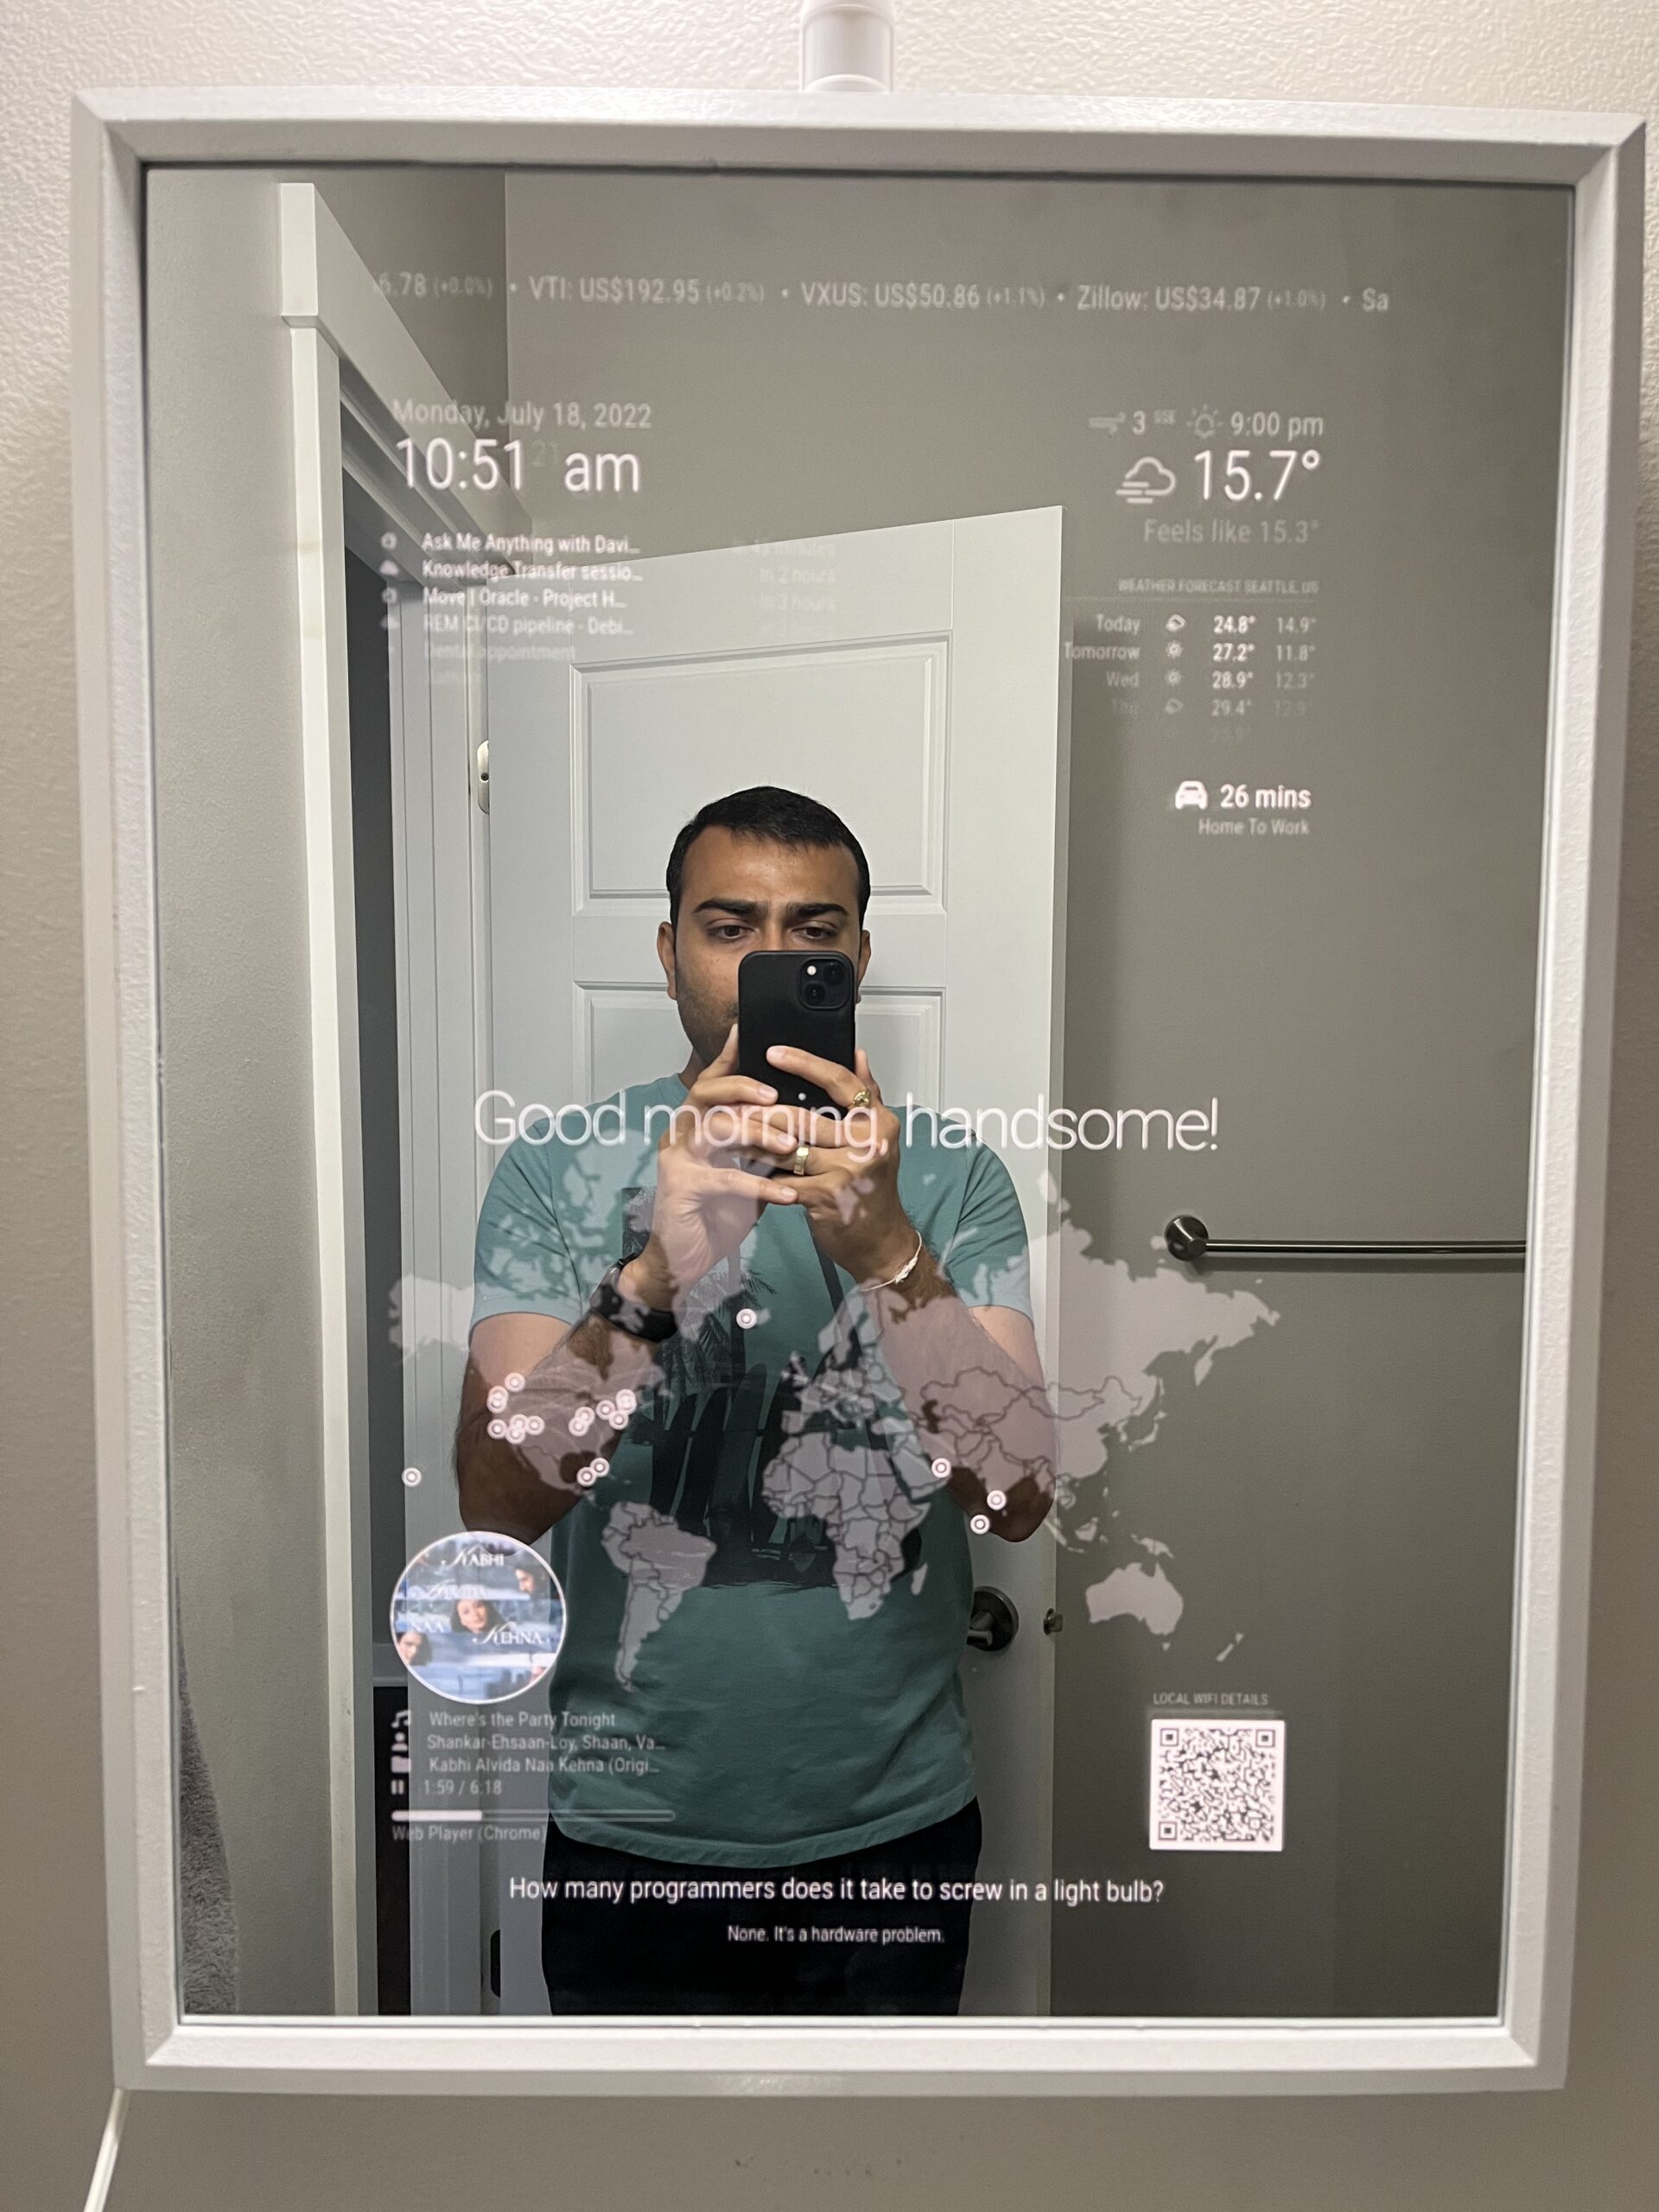
I finally built something I dreamt of 6 years ago. My first version back in 2016 was a cheap version of this with a 2-way acrylic film on a 7″ android tablet. Needless to say, this is a huge upgrade both in terms of size and cost. But the end result is something to marvel at and brings a smile every time someone looks at it.
Build
Parts list
- Shadow Box from Michaels (Black 18″ x 24″)
- Two-Way Glass Mirror from Amazon (MirroView 18″ x 24″)
- Black Cardboard from a local Dollar Store
- LCD Monitor
- I sacrificed one of the monitors I had (Dell U2717D 27″ Monitor). But you can use any 27″ monitor to maximize the available screen space on the mirror. Make sure its dimensions don’t exceed 18″ x 24″ and it has support for a VESA mount
- Vesa Mount (Option 1, Option 2 based on the total weight of your assembly)
- Raspberry Pi 3B+ or Raspberry Pi 4b with MicroSD card, Power Supply
- HDMI Cable
- 3-Prong Extension Cord
Steps
- Sanding (Optional)
- You might have to sand the inner frame down a little if you can’t get the mirror or the monitor to fit inside the frame
- Painting (Optional)
- Sand the entire frame lightly
- Apply a coat of primer (I find using a spray easier and quicker)
- Apply 1 or 2 coats of paint
- Stripping the monitor panel
- This helps reduce the weight and also keeps the whole assembly as slim as possible
- Reduce Light Bleed
- Use black cardboard to reduce the light bleeding from the back of the mirror. Test it out with the lights off and shining some light from behind
- Connect the Raspberry Pi
- Connect the Pi to the monitor via HDMI cable
- Refer to the Raspberry Pi setup instructions in the next section
- Attach Power Supply
- Attach the power supply to Raspberry Pi and the monitor
- For cable management, use glue or zip-ties
- Wall mount
- Use VESA mounts to hang the monitor + frame on the wall
- The whole assembly was about 22lbs and I didn’t feel comfortable using the picture hanging kit to hold the entire weight. Since the most weight comes from the monitor display, I decided to use a VESA mount. This way, the monitor holds the frame instead of the other way around.


Software
MagicMirror2 is an open-source modular platform for smart mirrors. Follow the installation and configuration instructions from the docs. After the installation and basic setup, you can use MMPM package manager, which is a self-updating command line and graphical interface designed to simplify the installation, removal, and maintenance of MagicMirror packages. MMM-Remote-Control module lets me control the display and other modules’ configurations via Home Assistant.
Modules
You can find a complete list of modules available here and here. Some of the modules I am currently using are listed below:
- updatenotification
- clock
- calendar
- compliments
- weather
- newsfeed
- mmpm
- MMM-Jast
- MMM-Traffic
- MMM-JokeAPI
- MMM-GoogleBirthdaysProvider
- MMM-Sonos
- MMM-Spotify
- MMM-NowPlayingOnSpotify
- MMM-iHaveBeenThere
- MMM-Carousel
- MMM-WiFiPassword
- MMM-TeslaMate
- MMM-EARTH
- MMM-Globe
- MMM-Remote-Control


